Pit and Fissure Sealant
•Descargar como PPT, PDF•
72 recomendaciones•12,726 vistas

The term pit and fissure sealant is used to describe a material that is introduced into the occlusal pits and fissures of caries susceptible teeth, thus forming a micromechanically bonded, protective layer cutting access of caries-producing bacteria from their source of nutrients.

Recomendados
Más contenido relacionado
La actualidad más candente
La actualidad más candente (20)
Similar a Pit and Fissure Sealant
Similar a Pit and Fissure Sealant (20)
Último
Último (20)
Pit and Fissure Sealant
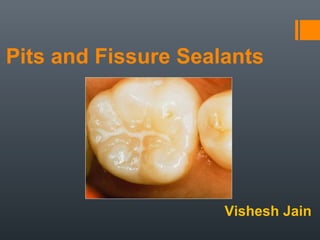
- 1. Pits and Fissure Sealants Vishesh Jain
- 3. Pit & Fissures A pit is defined as a pinpoint depression located at the junction of grooves present over the grinding surfaces of the teeth. A fissure is defined as a deep cleft between adjoining cusps of a molar or premolar, usually located at the junction of developmental grooves.
- 4. Pit and Fissure Sealants The term pit and fissure sealant is used to describe a material that is introduced into the occlusal pits and fissures of caries susceptible teeth, thus forming a micromechanically bonded, protective layer cutting access of caries-producing bacteria from their source of nutrients.
- 5. Why Sealant?
- 6. Why Sealants? The fissures and pits are normal anatomical findings in a dentition and caused by faults in dental enamel. Shallow fissures may not be problematic and be self cleansing and resistant to dental caries. However, deep and narrow fissures tend to lead to tooth decay. Both pit and fissures act as areas of initiation of caries due to food retention. To prevent dental caries. It is a safe, efficient and effective method of prevention of pits and fissure caries.
- 7. Dental caries are defined as a progressive irreversible microbial disease affecting the hard parts of tooth exposed to the oral environment, resulting in demineralization of the inorganic constituents and dissolution of the organic constituent, thereby leading to a cavity formation. Dental Caries
- 8. It has been well documented that occlusal surfaces in young patients have a high caries susceptibility. The incidence of caries is relatively low on smooth, self cleansing surfaces (i.e., buccal , lingual, mesial, distal) where fluorides are highly effective in reducing decay. Unfortunately, fluoride is not nearly as effective in the pits and fissures where approximately 50-85% of decay is found. The reason for this high rate of caries relates specifically to the pit and fissure morphology of occlusal and buccal/lingual surfaces. Bacteria are able to breed in deep, narrow fissures where enamel did not completely form (called non coalescence of enamel). In many cases toothbrush bristles cannot reach to the depths of these spaces to remove bacteria.
- 9. Susceptibility Upper and lower first molar 95% Upper and lower second molar 75% Upper second bicuspid 45% Upper first bicuspid 35% Lower second bicuspid 35% Upper central and lateral incisor 30% Upper cuspids and lower first bicuspid 10% Lower central and lateral incisor 3% Lower cuspids 3% Caries susceptibility of individual tooth surface occlusal > mesial > buccal > lingual
- 10. Sealants are the most effective clinical technique to prevent pit and fissure caries. The cost effectiveness of sealants, naturally, is based upon sealant retention. While the rates of sealant retention on occlusal surfaces are relatively high at five years, sealant retention for buccal and lingual pits and fissures of molars is considerably lower. There was 88% complete sealant retention of the self-cure sealant on the occlusal surface but only 35% retention on the buccal/lingual surfaces. The light-cure sealant had a retention rate of 81% for the occlusal surfaces compared to a 39% rate of retention on the buccal/lingual surfaces. These data indicate that, while the loss of sealant from occlusal surfaces averages 5-10% a year, for buccal and lingual surfaces the percentage of sealant loss increases to 30% per year, rendering this procedure less reliable. Thus, based on sealant retention rates, it follows that the occlusal surfaces should be easier to protect from caries than buccal/lingual surfaces.
- 11. Wilson used zinc phosphate Kline and Knutson- use of ammoniacal silver nitrate Extension for prevention: G. V. Black Prophylactic odontotomy : Hyatt (1923) Fissure eradication: Bodecker (1929) Acrylic polymers introduced to dentistry – 1937 Acid etching: Buonocore (1955) Composites – 1960 Unfilled resin- BIS-GMA: Bowen (1965) Glass ionomers – 1972 Historical Background
- 12. Classification 1) Polymerization methods: First generation: UV light Second generation: Self Cure Third generation: visible Light Fourth generation: fluoride releasing 3) Resin Systems BIS-GMA (Bis phenol alpha-Glycidyl Methacrylate Adduct) Urethane acrylate 4) Depending on presence of filler Filled Semi-filled 5) Depending on color Clear Tinted
- 14. The Glass Ionomer Cement were invented by Wilson and Kent in 1972 in London. Their use for pit and fissure sealing was advocated by McLean and Wilson in 1974. Characteristics which justify their use as pit and fissure sealant are: Physicochemical bonding with enamel and dentin. Release of fluoride ions Cariostatic and anti-microbial activity due to fluoride release. Biocompatibility. Resistance to oral fluids. Ease of use.
- 15. Studies of the use of GIC and resin modified glass ionomers as fissure sealants indicate significantly lower retention rates than resin-based pit and fissure sealants. However, several studies have found that GIC's exert a cariostatic effect even after they had disappeared macroscopically, and that this effect might be based on remnants of the cement in the fissure as well as increased levels of fluorides on the enamel surface, have been shown to be specifically beneficial in reducing occlusal caries. The use of GIC has been suggested for erupting teeth where isolation is a problem, especially in the high caries risk individuals. In this situation they can be considered more a fluoride vehicle than a traditional fissure sealant.
- 16. Requirements 1. Should have high flow properties i.e. low surface tension, low viscosity and low or zero angle of contact. 2. Adequate working time 3. Rapid cure 4. Good and prolonged adhesion to the enamel 5. Low sorption and solubility 6. COTE should be similar to tooth structure 7. Minimum irritation to tissues 8. Cariostatic action 9. Match the tooth color
- 17. Indications Carious occlusal anatomy- If pits or fissures are separated by transverse ridge, a sound pit or fissure may be sealed Carious pits or fissures- Deep, narrow pits and fissures General caries activity-mild, Many occlusal lesions; few proximal lesions Recently erupted teeth
- 18. Contraindications Many proximal lesions General caries activity-high Sound Broad, well-coalesced pits and fissures Teeth without caries (free for 4years or longer) Rampant caries / decay. Interproximal lesions . Occlusal surface is already carious. Tooth present in mouth for many years and there is no evidence of decay.
- 20. STEP BY STEP PROCEDURE 1. Cleansing of tooth 2. Tooth isolation 3. Enamel etching 4. Application of sealant material 5. Curing of sealant material 6. Inspection of sealant 7. Re-evaluation of sealant
- 21. 1. CLEANSING OF TOOTH Use a prophy cup and pumice with water (any non- fluoride paste can be used). Run explorer through the grooves to remove pumice. Thoroughly wash, dry, and re-examine. Mechanically prepare the tooth (optional ). There is no need for anesthesia.
- 22. 2. TOOTH ISOLATION To maintain a dry field, use rubber dams or cotton rolls. If the tooth is contaminated with saliva, the etching must be done over again.
- 23. 3. ENAMEL ETCHING 37% phosphoric acid in gel form applied 2/3 way the cuspal incline to create microporosities within the enamel. Etch tooth 20-30 seconds. Fully rinse and dry tooth.
- 25. 4. APPLICATION OF SEALANT MATERIAL Apply the sealant material according to manufacturer’s direction. A brush is used to allow it to follow the curvature of the tooth. The sealant may be light-activated or self-curing. Avoid air bubbles
- 26. 5. CURING OF SEALANT MATERIAL Visible light is used to cure (harden) the sealant material. Don’t touch tip of cure light to sealant material.
- 27. 6. INSPECTION OF SEALANT Use an explorer to ensure that all grooves are filled/sealed and smooth. Verify that the sealant doesn’t extend over the marginal ridge of the tooth. Check for occlusal interferences using articulating paper. If necessary, remove excess. No contact points on sealants. There is no need for further polishing.
- 28. 7. RE-EVALUATION OF SEALANT Observe the sealants at all future appointments. One may need to re-apply the sealant. Re-applications, along with fluoride, and other preventative measures can provide a 100% caries free and restorative free patient.
- 29. PROBLEMS AND SOLUTIONS Air bubbles may be present between or under sealants: Sealant should be ground down to expose the air bubble, and the bubble should then be filled / repaired Porosities may develop in the sealant: Reapply the sealant. If this is delayed, decay may form around the edges. Sealant may fall off : Reapply the sealant. Caries / decay left under the sealant : This is a contraindication for sealant placement. The sealant should be removed, and a filling should be placed.
- 30. Perfect isolation and maintenance of a dry field are essential!
- 31. Points to remember Etching agent should be 35-37% orthophosphoric acid. 15 sec. of etching is sufficient. There is benefit in using a bonding layer, which improves retention. Dry brushing, rotary brushing with pumice, air polishing and air abrasion are all acceptable for cleaning the tooth.
- 32. Flouride-containing sealants show no superiority to regular sealant. GI sealants show poor retention in comparison to resin based sealants. Autocured vs. light cured sealants show similar performance, However, autocure have more retention. Microleakage is greater in teeth that aren’t prepared before sealing, but if sealant falls, the preparation causes a higher chance of caries. Sealant is not supposed to be applied once.
- 33. NEW DEVELOPMENTS AND PROJECTIONS Argon laser curing: argon laser polymerization provides further caries protection against a cariogenic challenge over that afforded by fluoride-releasing sealants DIAGNOdent (KaVo): laser fluorescence system into detecting caries under sealants. Use of air abrasion 50 micron Alumina particles for tooth preparation.
Notas del editor
- The tray contains examination instruments, articulating paper and holder, sealant material (etchant and sealant), dental floss with which to check contact areas after sealant placement, a disposable prophy angle with which to prepare the tooth, moisture-control items (cotton rolls and a high-volume evacuator), and a dappen dish to hold liquid materials such as the pumice.