Review of the microscope
•Descargar como PPT, PDF•
5 recomendaciones•2,953 vistas

In this slide show i reviewed about the History,Basic principle, Parts and Use of the Compound microscope

Recomendados
Más contenido relacionado
La actualidad más candente
La actualidad más candente (20)
Destacado
Similar a Review of the microscope
Similar a Review of the microscope (20)
Último
Último (20)
Review of the microscope
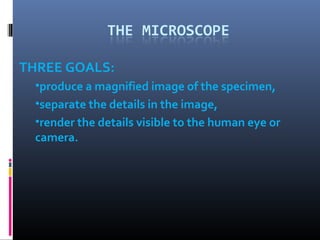
- 1. THREE GOALS: •produce a magnified image of the specimen, •separate the details in the image, •render the details visible to the human eye or camera.
- 2. The History • Hans and Zacharias Janssen of Holland in the 1590’s created the “first” compound microscope • Anthony van Leeuwenhoek and Robert Hooke made improvements by working on the lenses Anthony van Leeuwenhoek Hooke Microscope Robert Hooke 1632-1723 1635-1703
- 3. The History Zacharias Jansen The “First” Microscope 1588-1631
- 4. Types of microscopes Light microscopes Bright field microscope Dark field microscope Phase contrast microscope Fluorescent microscope Electron microscopes Transmission electron microscope Scanning electron microscope
- 5. Magnification • To determine your magnification…you just multiply the ocular lens by the objective lens • Ocular 10x Objective 40x:10 x 40 = 400 So the object is 400 times “larger” Objective Lens have their magnification written on them. Ocular lenses usually magnifies by 10x
- 6. RESOLVING POWER/ RESOLUTION • ability of a lens to separate or distinguish small objects that are close together • wavelength of light used is major factor in resolution shorter wavelength ⇒ greater resolution Actual What We Might See
- 7. WAVE LENGTH • Wave length of light – used for illumination – Visible range – 400 – 750nm (Shorter wave length – high resolution) E.g. Blue light has a shorter wave length than red light
- 8. NUMERIAL APERTURE • NA – of the objectives (property of lens that decides the quantity of light enter into it) – Two factors 1) Refractive Index 2)Angle
- 9. REFRACTION • The bending of light as it passes from one medium to another of different density • The bending of the light ray gives rise to an angle of refraction, the degree of bending • Index of refraction: A measure of the speed at which light passes through the material
- 10. ILLUMINATION • To collect and reflect the light – two devices – 1) Mirror 2) artificial Light • 1) Mirror – natural source or artificial source – Two side – reflective- plain – artificial light – Concave – natural source
- 11. Properties of Light:Light & Objects • Reflection: If the light strikes an object and bounces back (giving the object color) • Transmission: The passage of light through an object • Absorption: The light rays neither pass through nor bounce off an object but are taken up by the object
- 13. OIL IMMERSION
- 14. Ocular Lens Body Tube Nose Piece Arm Objective Lenses Stage Stage Clips Coarse Adj. Diaphragm Fine Adjustment Light Source Base The Parts of a Microscope
- 15. Body Tube • The body tube holds the objective lenses and the ocular lens at the proper distance Diagram
- 16. Nose Piece • The Nose Piece holds the objective lenses and can be turned to increase the magnification Diagram
- 17. Objective Lenses • The Objective Lenses increase magnification (usually from 10x to 40x) Diagram
- 18. Lenses • focus light rays at a specific place called the focal point • distance between center of lens and focal point is the focal length • strength of lens related to focal length – short focal length ⇒more magnification Copyright © The 18 McGraw-Hill Companies, Inc.
- 19. Stage Clips • These 2 clips hold the slide/specimen in place on the stage. Diagram
- 20. Diaphragm • The Diaphragm controls the amount of light on the slide/specimen Turn to let more light in or to make dimmer. Diagram
- 21. Light Source • Projects light upwards through the diaphragm, the specimen and the lenses • Some have lights, others have mirrors where you must move the mirror to reflect light Diagram
- 22. Ocular Lens/Eyepiece • Magnifies the specimen image Diagram
- 23. Arm • Used to support the microscope when carried. Holds the body tube, nose piece and objective lenses Diagram
- 24. Stage • Supports the slide/specimen Diagram
- 25. Coarse Adjustment Knob • Moves the stage up and down (quickly) for focusing your image Diagram
- 26. Fine Adjustment Knob • This knob moves the stage SLIGHTLY to sharpen the image Diagram
- 27. Base • Supports the microscope Diagram
- 28. How a Microscope Works Convex Lenses are curved glass used to make microscopes (and glasses etc.) Convex Lenses bend light and focus it in one spot.
- 29. How a Microscope Works Ocular Lens Objective Lens (Magnifies Image) (Gathers Light, Magnifies And Focuses Image Body Tube Inside Body Tube) (Image Focuses) •Bending Light: The objective (bottom) convex lens magnifies and focuses (bends) the image inside the body tube and the ocular convex (top) lens of a microscope magnifies it (again).
- 30. Caring for a Microscope • Clean only with a soft cloth/tissue • Make sure it’s on a flat surface • Don’t bang it • Carry it with 2 HANDS…one on the arm and the other on the base
- 32. Using a Microscope • Start on the lowest magnification • Don’t use the coarse adjustment knob on high magnification…you’ll break the slide!!! • Place slide on stage and lock clips • Adjust light source (if it’s a mirror…don’t stand in front of it!) • Use fine adjustment to focus
- 33. I. Dark field contrast microscopy takes advantage of objects that “scatter” light - this requires a special condenser that can “angle” the incident light II. Phase contrast microscopy takes advantage of objects that alter the phase of incident light - This requires “phase rings” in the condenser and in the objective lens III. Fluorescence microscopy take advantage of inherently fluorescent Material of biological objected that can be fluorescenlty labeled.
- 34. DARK FIELD MICROSCOPE Contrast Bright Field Phase Contrast Dark-Field
- 35. Dark field contrast microscopy takes advantage of objects that “scatter” light - this requires a special condenser that can “angle” the incident light
- 36. FLUORESCENT MICROSCOPE Optical System of a Fluorescein Fluorescence -excited by blue Microscope light (450-490) -emits green light (520-560)
- 37. [INSERT FIGURE 4.9] Fluorescence microscopy take advantage of inherently fluorescent Material of biological objected that can be fluorescenlty labeled.
- 38. Microscopy [INSERT FIGURE 4.10]
- 39. Applications of different microscopes Bright field – Stained slides Dark field – Live unstained cells Fluorescent – Microbiological material