Digital storytelling eifel2012
•
1 recomendación•20,362 vistas

Presentation at ePIC conference, London, July 9, 2012.

Recomendados
Más contenido relacionado
La actualidad más candente
La actualidad más candente (20)
Similar a Digital storytelling eifel2012
Similar a Digital storytelling eifel2012 (20)
Más de Helen Barrett
Último
Último (20)
Digital storytelling eifel2012
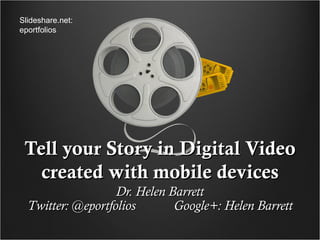
- 1. Slideshare.net: eportfolios Tell your Story in Digital Video created with mobile devices Dr. Helen Barrett Twitter: @eportfolios Google+: Helen Barrett
- 2. Outline of Presentation Why? The Power of Digital Storytelling in ePortfolios How? Apps & online tools to create digital stories Sequence of activities to construct a digital story http://sites.google.com/site/digitalstorysite/ https://sites.google.com/site/mportfolios/digital-storytelling http://sites.google.com/site/digitalstorytellingwiththeipad/
- 3. Voice Individual Identity Reflection Meaning Making New Literacy
- 4. The Importance of Voice “When words are infused by the human voice, they come alive.” - Maya Angelou
- 5. Why Digital Stories in ePortfolios? Reflection is the “heart and soul” of portfolios Digital Stories can humanize any model of ePortfolio Digital Stories add VOICE
- 6. Portfolio tells a Story "A portfolio tells a story. It is the story of knowing. Knowing about things... Knowing oneself... Knowing an audience... Portfolios are students' own stories of what they know, why they believe they know it, and why others should be of the same opinion.” (Paulson & Paulson, 1991, p.2)
- 7. Helping Students Tell Their Stories COLLECT more than text documents – Pictures – Audio – Video Focus on REFLECTION over time Help students make CONNECTIONS Support multimedia presentation formats
- 8. Reflection: The “Heart and Soul” of a Portfolio
- 9. Digital Storytelling Process Learners create a 1– 4 minute digital video clip – First person narrative [begins with a written script ~ 400 words] – Told in their own voice [record script] – Illustrated (mostly) by still images – Music track to add emotional tone
- 11. Mobile Devices (iOS) Apps
- 12. Lucy Created on iPod Touch with StoryRobe
- 13. Elements of a Digital Story Overall Purpose of 1. Pacing of the the Story Narrative Narrator’s Point of 2. Meaningful View Soundtrack - Emotional Content 3. Quality of the A Dramatic Question Images (or Questions) 4. Economy of the Choice of Content Story Detail Clarity of Voice 5. Good Grammar and Language Usage
- 14. 1. Overall Purpose for Story My Sister Sara – Family Stories – Heritage School, Anchorage, 2005
- 15. 2.Narrator’s Point of View -- Emotional Content Trey – “I am From” – Bremerton High School, 2009 http://vimeo.com/31978302
- 16. 3. Dramatic Question(s) James – I am From – Bremerton High School, 2009
- 17. 4. Choice of Content Jan Jimenez – Bremerton High School, 2009 http://vimeo.com/31978410
- 18. 5. Clarity of Voice 6. Pacing of Narrative Aimee’s Soccer Story http://www.youtube.com/watch?v=zB8y7SISwwI
- 19. 7. Meaningful Soundtrack Use royalty-free or Creative Commons Music Use sound effects instead of music Write your own!
- 20. 8. Quality of the Images Use Creative Commons Advanced Image Search (Flickr) Use “labeled for reuse” in Google Images advanced search Use your own pictures (digital camera or scan photos)
- 21. 9. Economy of Story Detail KISS: Keep it Simple, Student Focus on essential elements of story Leave out unnecessary details
- 22. A Dozen Purposes for Digital Storytelling Introduction of Self Rich Multimedia – Voice & Personality Artifacts – Legacy – Evidence of – Biography Collaboration – Documentary – Memoir – Record of Experience Reflection – Oral Language – Transition Development – Decision & Direction – Benchmarking Development – Change over Time
- 23. Voice & Personality Voice is often missing from electronic portfolios, both literally and rhetorically. A digital story provides that voice: listening to the author, we hear a real person, getting a sense of their unique personality. For young children, do an interview!
- 24. Tori – 1 Grade st QuickTime required: http://homepage.mac.com/eportfolios/iMovieTheater26.html
- 25. Legacy Digital stories can provide us with an opportunity to leave a legacy of our family stories for those who come after us. Legacy stories are usually told about a person or place.
- 26. Biography A biography provides the facts about a life, whether of the storyteller or another person. Victoria’s 2nd Grade Autobiography
- 27. Victoria’s 2nd Grade Autobiography
- 28. Tori – 2 Grade nd http://vimeo.com/eportfolios/autobioip
- 29. Memoir Whereas a legacy story is told for or about another person or place, a memoir is very personal, told in the first person, focusing on the memories of the storyteller. Memoirs are autobiographical in nature, but are much more personal and reflective. They are often much longer than a typical digital story.
- 30. Reflection - Transition Some learners reflect on the major changes or transitions in their lives. Reflection can help us make sense of these changes. Telling digital stories could also help the transition to retirement or any other major life change. Coming Full Circle (link from web page)
- 32. Deana
- 33. Reflection - Decision Digital stories can be used to either weigh the options in a decision to be made or document the process used to make decisions. Choices (embedded on web page)
- 34. Reflection – Retrospective “Good Moring Sunshines” Erin, CDS, August 2009http://www.youtube.com/watch?v=1ObJ0iUdLR4
- 35. Benchmarking Development at each point (of development) a digital story snapshot would be an extremely appropriate part of a portfolio
- 36. Change over time Maintain a collection of work over time Recognize when growth and change has occurred Reflect on the changes they see in their own performance Process has the potential to increase students’ self esteem.
- 37. Tori – 6 grade poemth QuickTime Required: (Victoria, 2007) http://homepage.mac.com/hbarrett/family/iMovieTheater85.html
- 38. Evidence of Collaboration Much of the work in both schools and the workplace is the result of collaboration a digital story could provide explanation of the process.
- 40. Documentary A digital video can take the place of a research paper or a PowerPoint presentation. Story takes on characteristics of a documentary, often fact-based without emotional content. What is Digital Storytelling? (link from web page)
- 41. What is Digital Storytelling http://www.youtube.com/watch?v=wHm8CNPTRpQ
- 42. Record of Experience Often no concrete product that can be represented in a discrete artifact. could be used to reflect on and document an experience could provide the final evidence of a project-based learning activity Chevak (link from web page)
- 43. Chevak (student teacher, Alaska, 2001) http://vimeo.com/eportfolios/chevak
- 44. Oral Language learning to speak in a second language early childhood students learning to read in their native language learners record their voice, speaking or reading out loud at different stages of development demonstrating growth over time. "podcast" could be an audio-only digital story without the visual component
- 45. Rich Digital Artifacts Showcase student work with explanatory narrative
- 46. Naya’s Portfolio Naya, Anchorage School District, May 2000
- 47. Voice = Authenticity multimedia expands the "voice" in an electronic portfolio (both literally and rhetorically) personality of the author is evident gives the reflections a uniqueness
- 48. Tori - Kindergarten QuickTime Required: (Victoria, Kindergarten, 2003) http://homepage.mac.com/eportfolios/iMovieTheater25.html
- 49. How to Develop Digital Stories Process and Tools
- 50. Process to develop digital stories 1. Script development: write the story, often with a group called a story circle to provide feedback and story development ideas 2. Record the author reading the story (audio recording and editing) 3. Capture and process the images to further illustrate the story (image scanning and editing) 4. Combine audio and images (and any additional video) onto a timeline, add music track (video editing) 5. Present or publish finished version of story
- 51. Tools Macintosh Web 2.0 iOS Windows Write script: GoogleDocs GoogleDocs Any word any word procssor processor Myna (Aviary) AudioBoo, recordmp3.org Voice Memos Record Audio: Audacity Audacity Adobe PS Aviary Tools Express, Picasa3 /GarageBand (image editors) PhotoEditor Edit images: HD, TouchUp iPhoto Animoto, VoiceThread, Storyrobe, MovieMaker2 ReelDirector PhotoStory3 Edit video: YouTube, iMovie, Splice, iMovie Stupeflix Avid Studio http://electronicportfolios.org/digistory/tools.html
- 52. What’s Your Story? Richness not possible in print Audiences worldwide but most likely small and intimate.
- 53. Convergence
- 54. This following Word Cloud was created collaboratively by educators around the Wordle.net world, who contributed keywords that came to their mind when thinking about Digital Storytelling. Words that appear larger were used by more contributors. http://langwitches.org/blog/2008/07/27/digital-
- 55. What is the process? http://electronicportfolios.org/digistory/howto.
- 56. Step 1: Decide on the Story You Want to Tell Stories Created by Teachers Can Serve: As a Lesson Hook As a Way to Integrate Multimedia into the Curriculum As a Way to Make Difficult Content More Understandable To Facilitate Classroom Discussion
- 57. An Effective Learning Tool for Students Research Skills Interview Skills Writing Skills Interpersonal Organization Skills Skills Problem-Solving Technology Skills Skills Presentation Assessment Skills Skills
- 58. Step 2: Gather Your Materials Start gathering photos, digital video, flyers, mementos — anything that holds emotional resonance. Don't think you have to go out and visually capture a story with a camcorder or camera. Use what you have! Export Powerpoint slides to JPEG (Save As…) Capture digital photos with any camera (including cell phones) • Get permissions for using images of students OR learn how to take anonymous photos (no faces) http://www.techsoup.org/learningcenter/training/page5897.cfm
- 59. Step 3: Begin Writing Your Script • Play out a rough story in your head. • Sketch out a script that you'll soon record with your own voice. People want to hear a personal voice. Get personal. Write lousy first drafts. Don't edit as you go. • Write short. You'll be surprised at how much you can convey with a few words and some key images. Read your script aloud as you're fine-tuning it. Don't hold back. Be real. http://www.techsoup.org/learningcenter/training/page5897.cfm
- 60. Script writing (cont.) • Look for a narrative arc for your story. All stories — even three-minute gems — have a beginning, middle, and end. • Work on the pace. Many consider pacing to be the true secret of successful storytelling. The rhythm and tempo of a story is what sustains an audience's interest. Trust your voice. All of us have our own distinctive style of storytelling. Trust yours. Read your script to a friend when you think you've finished. http://www.techsoup.org/learningcenter/training/page5897.cfm
- 61. Step 4: Prep Your Equipment • A desktop computer or laptop. • Video software such as Apple iMovie, MovieMaker2 or PhotoStory3. A (desktop) scanner, if you want to include traditional photos in your story. Additionally, if you plan to record interviews, you'll need: A recording device: for video, a camcorder; for audio, a portable digital recorder or an analog cassette recorder (if you use analog video or audio, you'll also need to convert it to digital). A handheld microphone for audio interviews. Headphones. http://www.techsoup.org/learningcenter/training/page5897.cfm
- 62. Step 5: Create a Storyboard • A storyboard is simply a place to plan out a visual story on two levels: 1) Time — What happens in what order? and 2) Interaction — How does the voiceover and music work with the images or video? • A good rule of thumb is to use no more than 15 images and no more than two minutes of video. As a general rule, four to six seconds is the ideal time for an image to appear on-screen, http://www.techsoup.org/learningcenter/training/page5897.cfm
- 63. I. Script • Look at examples of specific stories on the WWW. • Use the Script template, answering these questions: • Who is your audience? • What is your dramatic question? You may want to go over your script with a facilitator before recording your voice-overs. Use GoogleDocs to share your story for feedback DEMO – Script in GoogleDocs
- 64. What’s Your Story? Conducting a Story Circle
- 65. II. Record Voice Narration Use a microphone and transfer your audio clips to your computer. Easi-Speak
- 66. Mobile Devices (Chrome & iOS) • Recording Script- Audio Recording Apps
- 67. How? Recording Digital Audio • On a computer* On a digital tape recorder • On an iOS device * Requires software
- 68. On a Computer • Software: Audacity (free) • Recommend using external Microphone • Need a Computer (less portability) Samson USB Mic
- 69. Audio Editing Software • Audacity (free download) Audacity Tutorial Garage Band • DEMO
- 70. On a Digital Recorder • Portable • Digital= Good Quality but Expensive • Analog= Lower Quality but Cheap • Transfer into computer – Digital = file – Analog = cable+software
- 71. Step 6: Record a Voice- Over • On a computer* (use Audacity) - using external Microphone (record your voice-over at the same quality level that you record your musical soundtrack: 16-bit, 44 kHz.) On a digital tape recorder Digital= Good Quality but Expensive Speak slowly in a – Analog= Lower Quality but Cheap conversational Transfer into computer voice. Don't make Digital = file it sound like you're – Analog = cable+software reading from a script. http://www.techsoup.org/learningcenter/training/page5897.cfm
- 72. Step 7: Digitize Your Media • If you're using photos, you'll need a flatbed scanner. Scan them and save them to a single folder on your computer. (200 dots per inch) • If you're using digital photos, make sure they're in JPEG format. Keep in mind that your video will be horizontal in form, so crop accordingly. Don't distort vertical photos into horizontal ones, but realize that strong vertical shapes will appear with lots of black on both sides. http://www.techsoup.org/learningcenter/training/page5897.cfm
- 73. Mobile Devices (Chrome & iOS) • Recording Script- Image editing apps
- 74. III. Images Scanned and Sized When searching Google images, select only the Large or Extra Large images (Size: Larger than 640x480) Scanning from a book use 200 DPI.
- 75. Sources of Creative Commons Images • Flickr Creative Commons Search • Google Images (labeled for reuse) Your own Digital Camera Scan photographs or artifacts
- 76. IV. Background Music • Freeplaymusic.com is a good starting point. If you purchase any music from iTunes, it is protected to the computer where you downloaded it when you purchased it. • You will need to burn any purchased song on a Music CD (with iTunes) and import the music directly from the CD. • Music often overwhelms voiceovers. Edit volume on the low end under your narration (> 10%) but you could increase the volume when no voice is present.
- 77. Step 8: Add Music • Choose music that evokes the rhythm and pace of your story. • Next, go out and grab the music in digital form: http://freeplaymusic.com Pod Safe Audio: http://www.podsafeaudio.com/ Jamendo http://www.jamendo.com/en/ (Free music downloads in MP3) http://creativecommons.org/legalmusicforvideos/ - Creative Commons Yahoo Music: http://new.music.yahoo.com/ http://www.archive.org/details/netlabels - Archive.org’s NetLabel Find a talented friend to play an original work on the piano or by strumming the guitar -- solves the copyright problem. Garage Band & Myna – create your own with loops http://www.techsoup.org/learningcenter/training/page5897.cfm
- 78. Adjusting Volume in Audacity • Use the Envelope tool • Click on audio and drag down to lower volume
- 79. V. Rough edit • Place your narration (II), sound track (IV) and images (III) on the timeline in approximate locations. Ask for feedback. DEMO
- 80. Step 9: Edit Your Story (with video editing program) • Import all images, video, your voice-over, and musical elements • Lay your narration track onto the timeline first Add your images to match your narration Create an initial rough cut before adding transitions or special effects Add titles, transitions, special effects sparingly Expect to spend a few hours editing your story to get it just right. Don't overproduce: often the spontaneity and directness of the initial drafts get lost with too much polishing. http://www.techsoup.org/learningcenter/training/page5897.cfm
- 81. VIII. Publish • Save two versions of your file (File Menu -> Share): – QuickTime -> CD-ROM (and name it your “projectname”.mov) (which can be played from the CD) – QuickTime -> Web-Streaming (and name it your “projectnameweb”.mov) (which creates a version that can be posted to the WWW)
- 82. Websites to Share Video • YouTube: http://www.youtube.com/ TeacherTube: http://teachertube.com/ SchoolTube: http://schooltube.com/ • Blip.tv: http://blip.tv Vimeo: http://www.vimeo.com/ Facebook video GoogleDocs/Google Drive
- 83. IX. Showtime! In a face-to-face workshop, watch the “big” version of your movie. In web workshop, upload the “small” version to WWW
- 84. Online Storage • You can also choose an online file storage system, such as the one that Ed uses: Microsoft Windows Live Sky Drive: http://skydrive.live.com • The advantage of this system is that you can store up to 25 GB of all types of files, and you can password-protect your files. I also like http://www.divshare.com/ to store files online, because they give you the code to embed your video into a blog or website (just like the video sharing sites). They let you store up to 5 GB of files.
- 85. X. Assessment • Examples of Rubrics – Links on Google Site
- 86. Next Steps • Send your scripts for feedback (share in GoogleDocs to eportfolios@gmail.com) or attach in email • Start collecting digital images Start looking for background music
- 87. Examples My Reflection on my own Professional Learning for my Professional Portfolio Link on Web Page
- 89. Dr. Helen Barrett • Researcher & Consultant Electronic Portfolios & Digital Storytelling for Lifelong and Life-Wide Learning eportfolios@gmail.com http://electronicportfolios.org/
- 91. My Final Wish… May all your electronic portfolios include dynamic celebrations and stories of deep learning across the lifespan.
Notas del editor
- gives the feeling that the writer is talking directly to the reader/viewer
- We all have a story to add to our portfolios. These digital stories provide opportunities for a richness not possible in print. Some stories will represent the fresh innocence of youth, some will reflect the experiences of a rich life. The audiences might be worldwide, like the BBC Wales, but most likely the audiences will be small and intimate.
- We all have a story to add to our portfolios. These digital stories provide opportunities for a richness not possible in print. Some stories will represent the fresh innocence of youth, some will reflect the experiences of a rich life. The audiences might be worldwide, like the BBC Wales, but most likely the audiences will be small and intimate.